Variations on a Theme
 |
 |
One of my favorite things to do when I'm designing is to come up with an element that I can make a bunch of and use in many different ways. This week I started working on new variations of the cherry blossom design. This is a pattern I created a couple of years ago, but until this week have only made the basic drop in sterling silver. Lately I have really been in the mood for the warmth of the golden brass. To me it just kind of glows with happiness.
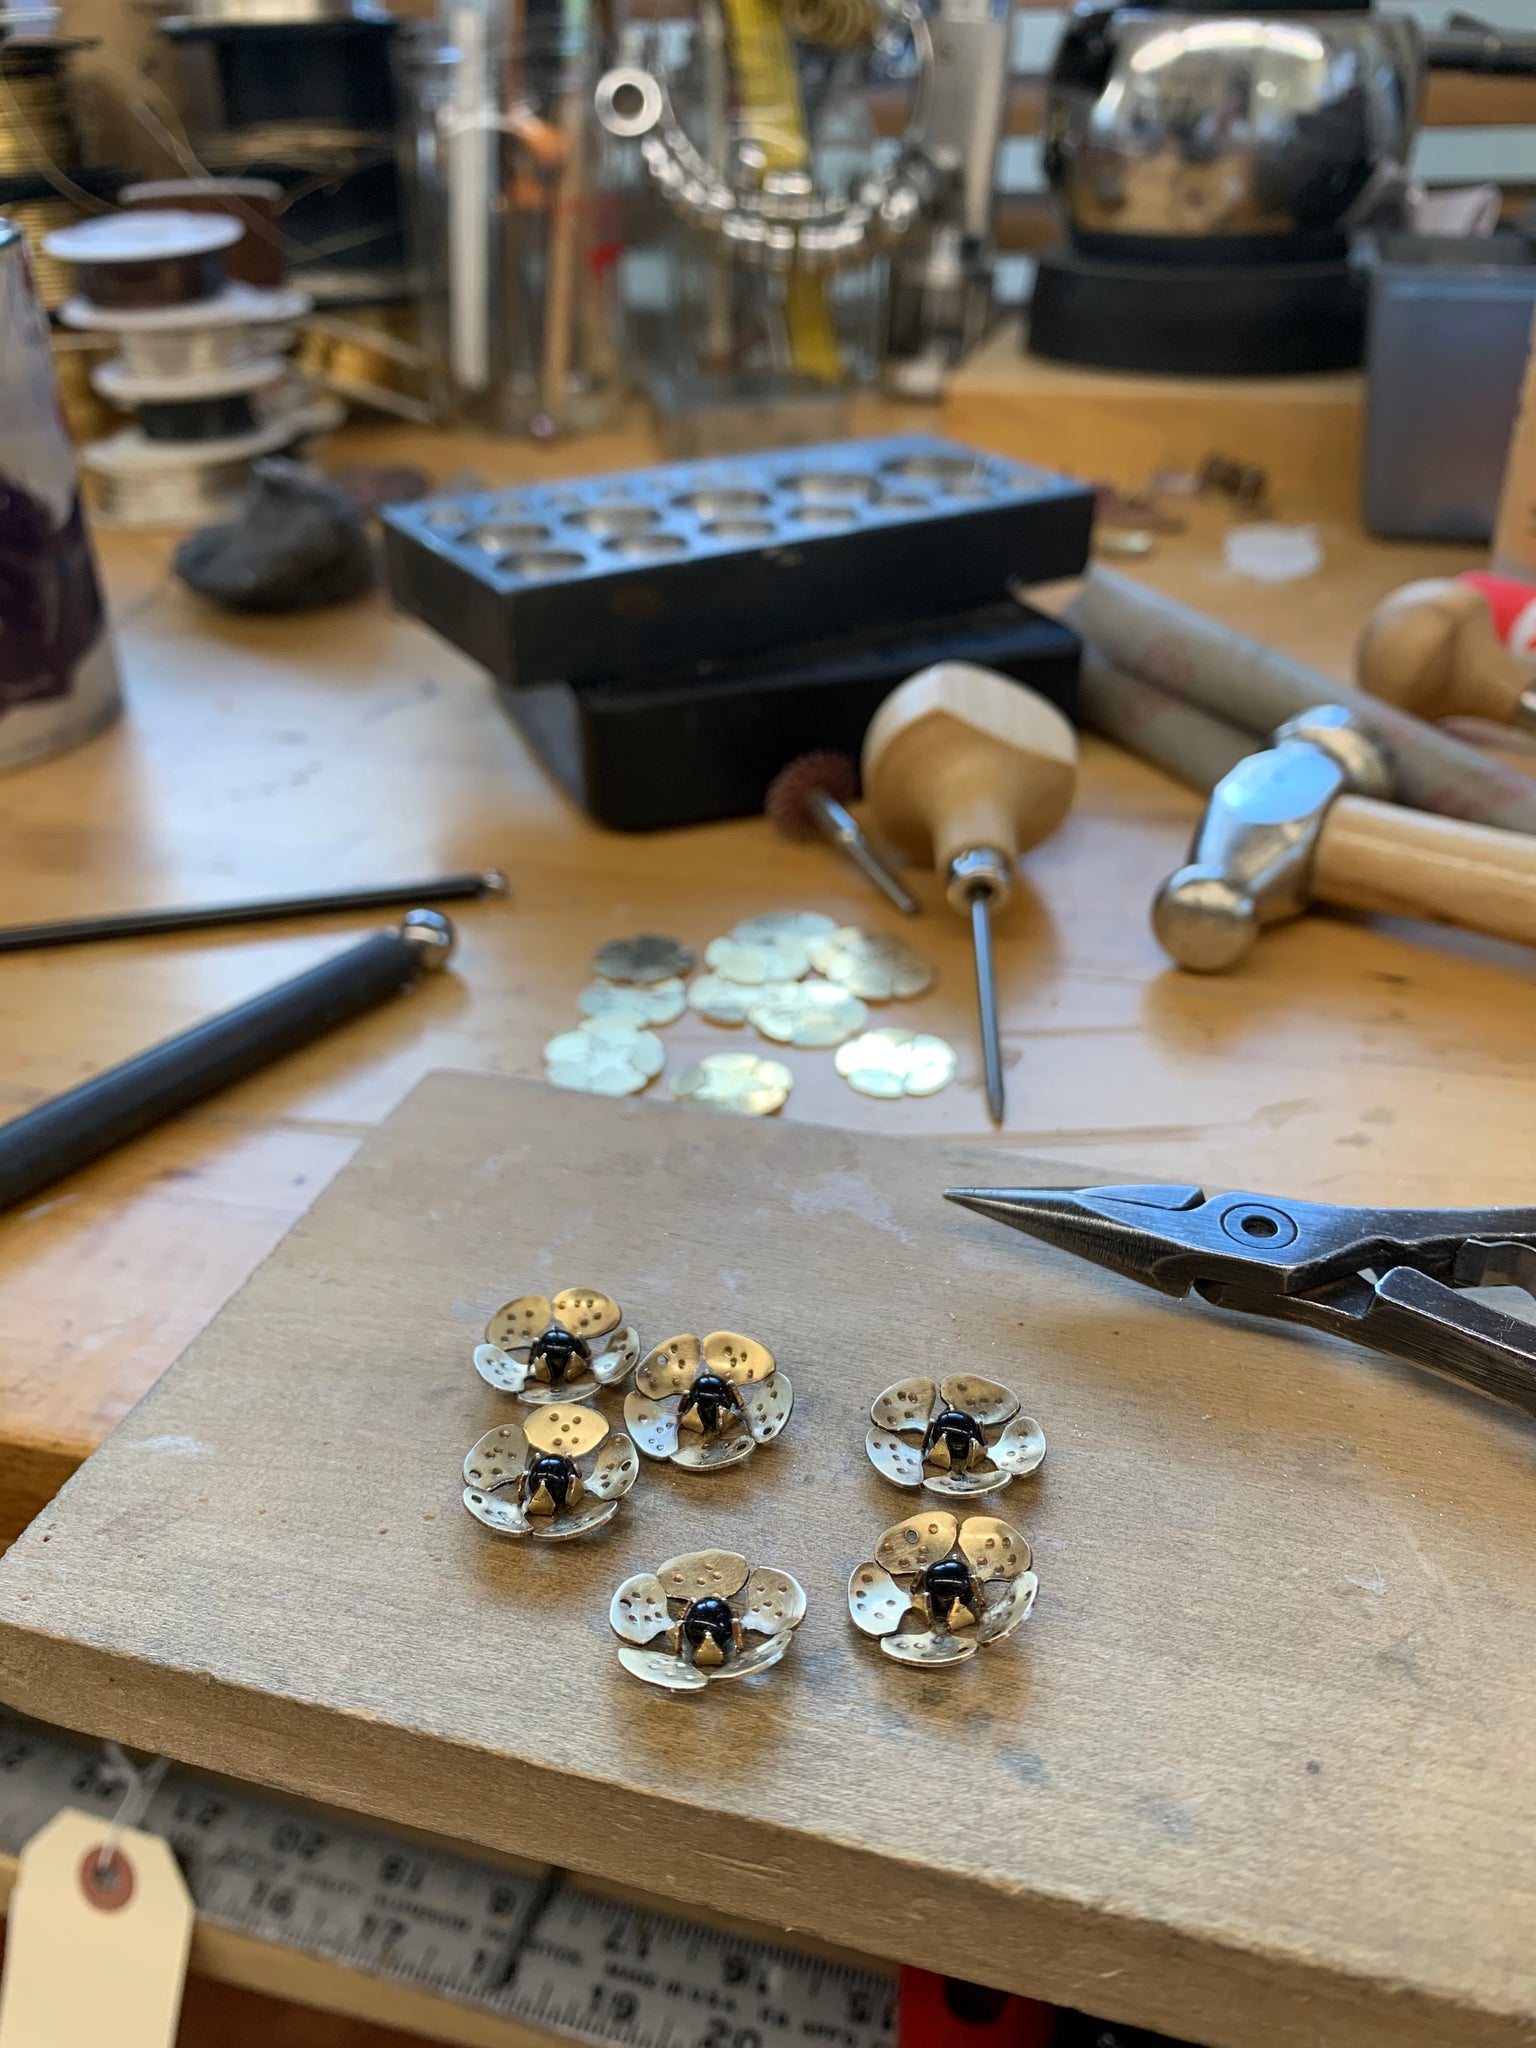
Today I want to share the process with you and to show that sometimes designs look deceptively simple, yet are actually quite work intensive. This is what you get when you buy handmade, dedication and love of the craft. It takes years to build the skill and collect the necessary tools to create with. You get a lot of hard work for the money. In this case, these pieces all hover around the $30 price point. Pictured above are a couple behind the scenes shots, and the finished product. Below I created a list of the many steps it makes to create these little flower pieces as a way to describe the process and help you understand what goes into creating a piece of wearable art.
1. First I create the pattern.
I often create my patterns on adobe illustrator as a vector line drawing. That way I can easily scale any pattern to a desirable size to fit any project.
(For example, I actually use the same pattern that I created in a much smaller size to create the "Pretty Petals" and "Rosebud" collections. It is the same design, but I manipulate the metal in a different way and scale to create a very different look. Go check them out.
https://www.adornjewelryandaccessories.com/search?type=product&q=*pretty%20petals* https://www.adornjewelryandaccessories.com/search?type=product&q=*rosebud* )
After the pattern is created,
2. I print it out and glue it to my metal sheet.
In the case of the cherry blossoms I made this week, I used a sheet of brass.
3. Then I carefully hand saw the shapes. This can be very tedious. That is why very often, I will set aside a day where all I do is saw out project blanks. I like to get that part out of the way and then I can use those blanks as I need in the future. (you can see a handful of unused blanks in the background of the top photo that I plan on making more variations with in the near future)
After the pieces are cut out, the fun begins. I love my hammers and I love hammering :) It is almost like a form of therapy - pounding on things - and in these days we are caught in, a lot of hammering is just what the doctor ordered.... right? lol.
4. For these pieces, I use a hammer and center punch to create the dotted texture as well as to create the guide for the drill bit.
5. Drill Holes, this varies from design to design. As you can see from the finished jewelry photo.
6. Next I use my dapping set. It is a nifty steel block (you can see that in the top photo) that has a variety of concave cuts, and then there are corresponding punches that look like steel balls on a stick. Together you can use them to hammer concave (or convex, depending on the finished piece) shapes into the metal. I find this works perfectly to create the curvature of a flower.
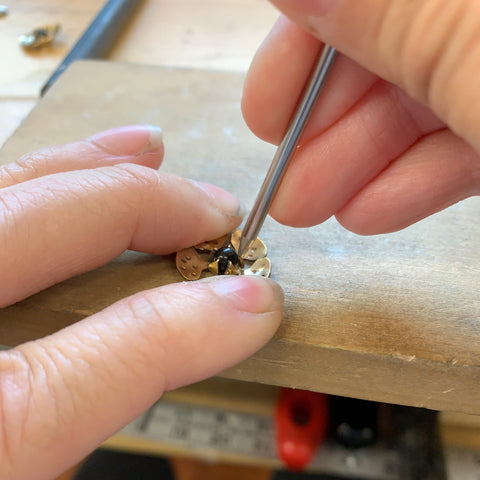
7. I knock the prong elements of the design straight up at a perpendicular angle to the rest of the flower.
8. Sand the edges and surface (file if necessary)
9. Oxidize the pieces (putting them in a liver of sulfur solution to darken the metal)
10. Flat sand the surface again to brighten up most of the metal leaving only the indented details darkened. This really gives the piece depth.
11. Burnish the elements in a tumbler with steel shot to give the whole piece a nice satin finish and also to work harden the metal so that it won't easily become mis-shapen.
12. Choose and set the glass pieces in the center using a prong pusher to form those little petal bits over the glass to hold it into place.
13. Use what is called a beading tool on the tips of the prongs to round off the points. We don't need pokey jewelry. :)
14. Paint on the clear coat (this is something I use on the brass so that the finish will not tarnish or react with your skin)
15. Add the chain, ear wires, or bead dangles to the pieces as needed.
You can check out the details of the new designs here:
https://www.adornjewelryandaccessories.com/search?type=product&q=*cherry%20blossom*
Thanks for reading this far. I hope you enjoyed my little process tour. I may do some more of these step by step descriptions from time to time if you are interested.
Wishing you a super day.
Sending virtual (((hugs)))
xoxo
Erica
Comments
Anonymous said:
This is so interesting, how you start and all the steps it takes to create something so pretty and all of your techniques and skills! No wonder everything you make yourself turns out so nicely! Cheers!
Chrissy Lapham said:
Beautiful design and impressed by the amount of detail and care involved in making them! Thanks for sharing what goes into your work!